Connect the charger to an OCPP backend
Link a Veton charger to a charge-point operator's back-office over OCPP 1.6, from the app, the local page or the portal.
Ce guide n'est pas encore traduit dans votre langue. Vous le lisez en anglais.
What you need first
OCPP lets a charge-point operator (CPO) see the charger, authorise sessions and bill them. This guide replaces the old OCPP quick-start sheet. Before you begin, agree these things with the CPO:
- The backend address (a wss:// URL). Veton keeps a list of known providers, so for most CPOs you only pick a name.
- The charger's identity. The CPO registers the charger under its serial number, which becomes the ChargeBox id at the end of the URL. The serial is printed on the charger's label and shown read-only in the OCPP card.
- How many connectors the charger has. A Two has two; a One or a Wall has one. Auto-configure numbers them 1 and 2 in the order the charging points are configured on the controller.
Connecting a charger to OCPP is three things: set the backend URL, switch every charging point's release mode to OCPP, and number the connectors. On each route below, one button does all three; saving the URL alone does only the first.
Route 1: the Veton app, preferred
The app works from anywhere the charger is reachable, on site or remotely, and needs no local network.
- Open the charger in the app, go to Settings and open Installer Settings.
- Open the OCPP Backend card.
- Pick the backend from the list, or choose Custom and enter the URL the CPO gave you in Backend URL. Machine ID, Serial Number, Vendor and Model are shown read-only.
- Tap Auto Configure OCPP. This saves the URL, switches every charging point to release by OCPP, numbers the connectors and restarts the OCPP service; the card counts down while the service comes back.
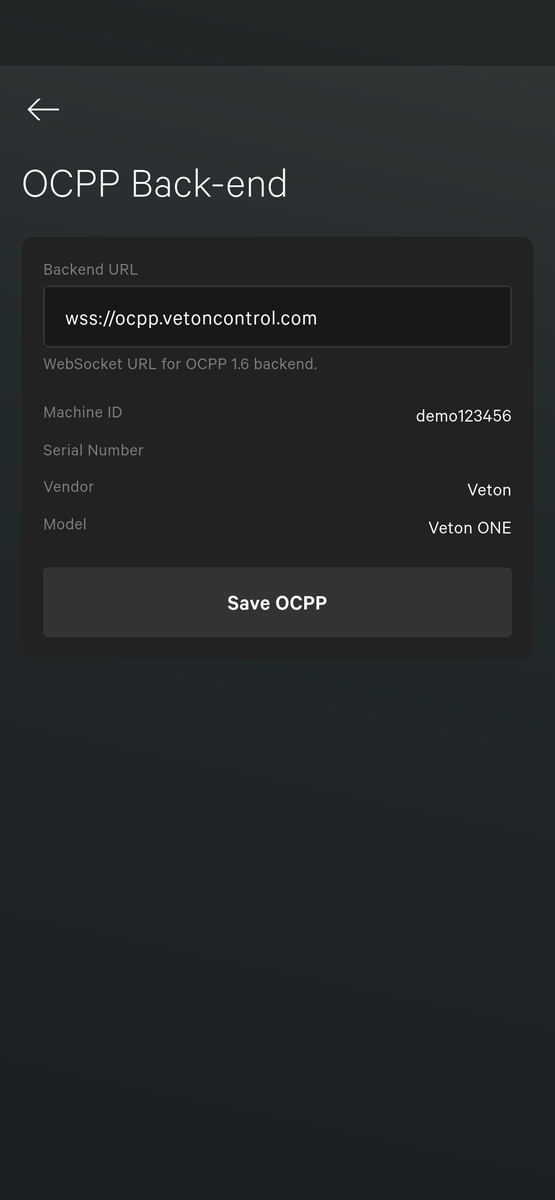
Save URL Only and Save OCPP only store the backend address. The charging points keep their current release mode, so a charger saved that way talks to the CPO but still releases as before. Auto Configure OCPP appears when your account may configure both OCPP and the charging points, and the charger has at most two charging points; otherwise set the release mode per charging point yourself, as below.
To check or correct a single charging point, open its card under Installer Settings: set Release Mode to OCPP, fill in OCPP Connector ID, pick the RFID Reader the backend should use, or None, and tap Save Charging Point.
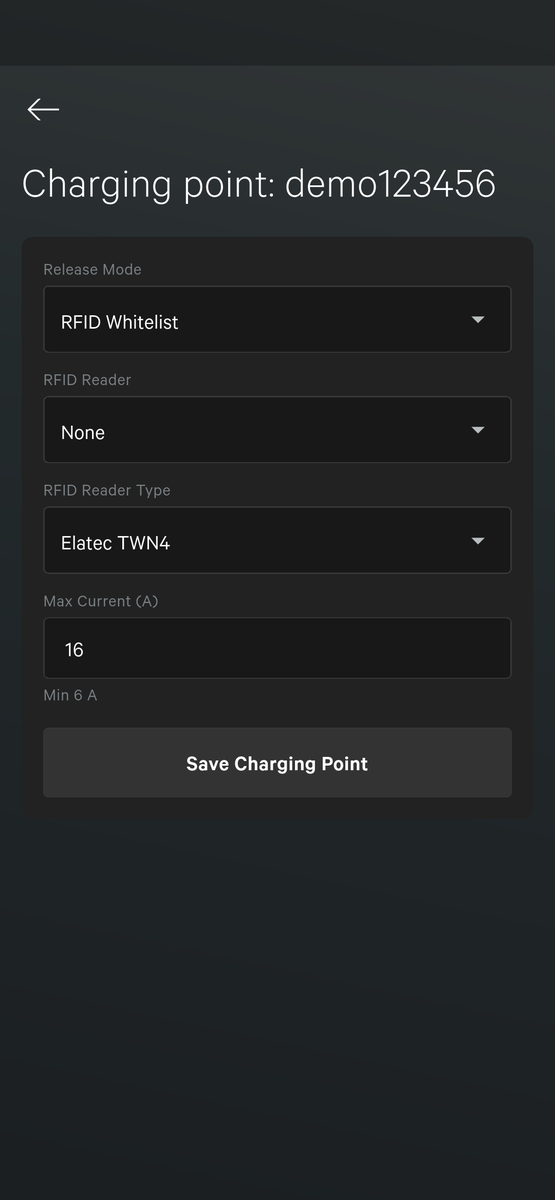
The authorization step of the app's setup wizard offers the same choice: Always release, OCPP, or Local card whitelist. Choosing OCPP there does the same as Auto Configure OCPP.
Route 2: the charger's local page
Use this on site when the app is not to hand. Open http://ev3000.local:8080, log in with the installer account and open Settings, then the OCPP card.
- Under OCPP backend, pick the provider. If the CPO is missing, click Check for new providers, or pick Custom and paste the URL.
- Check the Composed URL: it is the backend address followed by a slash and the charger's serial. The serial, vendor and model are read-only.
- Click Save URL.
- Click Auto-configure. This sets every charging point to release by OCPP, numbers the connectors in order, and restarts the OCPP service.
- Ask the CPO to confirm the charger is online in their system.
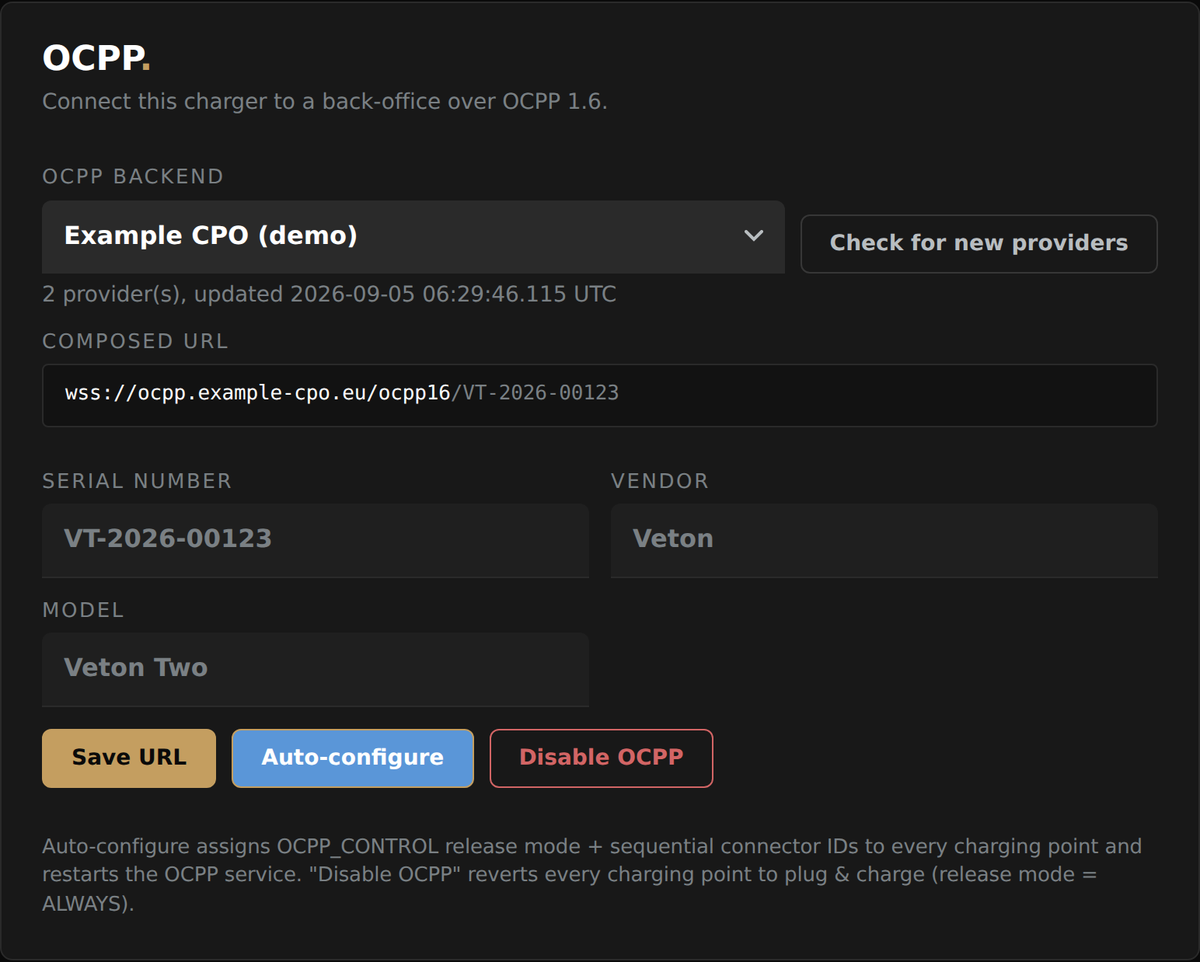
To take the charger off OCPP again, click Disable OCPP. Every charging point goes back to plug and charge, so anyone who plugs in can charge.
Route 3: the portal
On v2.vetoncontrol.com, open the charger, go to the Settings tab and find the OCPP section. Auto Configure OCPP there does the same as in the app: it sets the URL, switches every charging point to OCPP release and restarts the service. The release mode per charging point can also be edited by hand in the Charging Points section. Use it when you are not on site and do not have the app.
Open the portal S’ouvre sur un autre site
Release by OCPP
A charging point's release mode decides who may start a session.
- Always: plug and charge. Anyone can charge.
- OCPP: the backend decides. A session starts when the CPO authorises it, usually after a card tap or a start from the CPO's app.
- RFID whitelist: the list of cards stored on the charger decides.
When OCPP is active, the CPO's authorisation replaces the local card list: cards must be registered with the CPO, not on the charger. See the RFID cards guide for the local list.
If the charger does not connect
- The composed URL must end in exactly the identity the CPO registered. A different case or an extra space is a different charger to them.
- The charger needs a working internet connection with DNS. A charger that shows online in the Veton app has one.
- Some CPOs must whitelist the charger before it may connect. Ask them.
- If nothing helps, open a support case from the portal with the serial and the CPO's name. Without a portal account, reach Veton through the contact page instead.
Contact Veton S’ouvre sur un autre site